Udacity is a great place to get online-paid courses. However, if you don’t want to learn from Udacity and looking forward to enrolling in other alternatives like Udemy, Courser, or others, you might want to delete your Udacity account at first. Deleting an Udacity account is permanent and cannot be recovered once confirmed. Here’s how to do it.

Note: If you have any active enrollments, you have to cancel them first to prevent future charges.
How to delete your Udacity account permanently?
Here are the steps to close your Udacity account through the web browser. Likewise, after deleting your account, it might be impossible to restore it again, so make sure if you really want to delete your Udacity account. If yes, follow the given instructions:
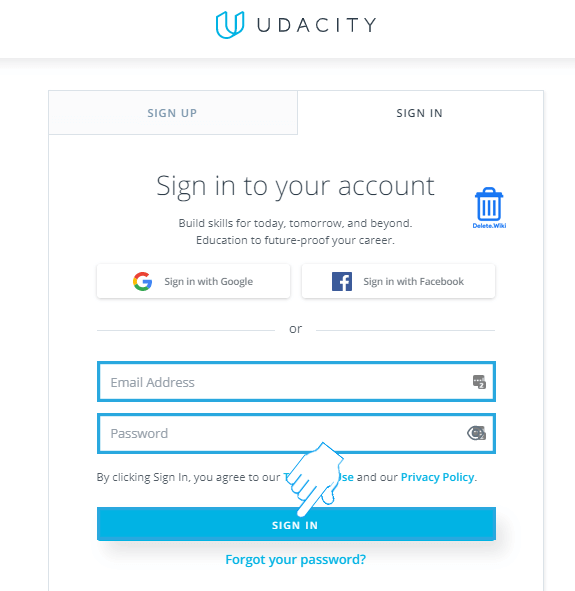
- Go to classroom.udacity.com and log in to your account.
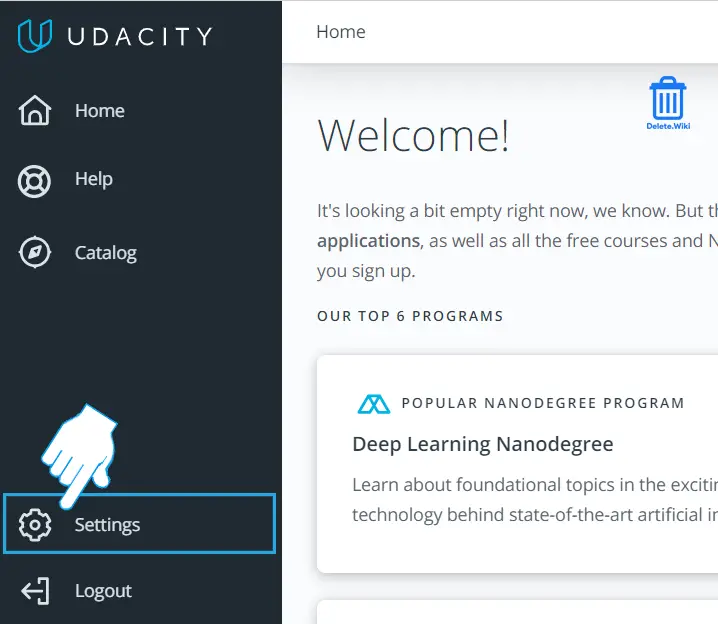
- Click on Settings at the bottom left corner of the page.
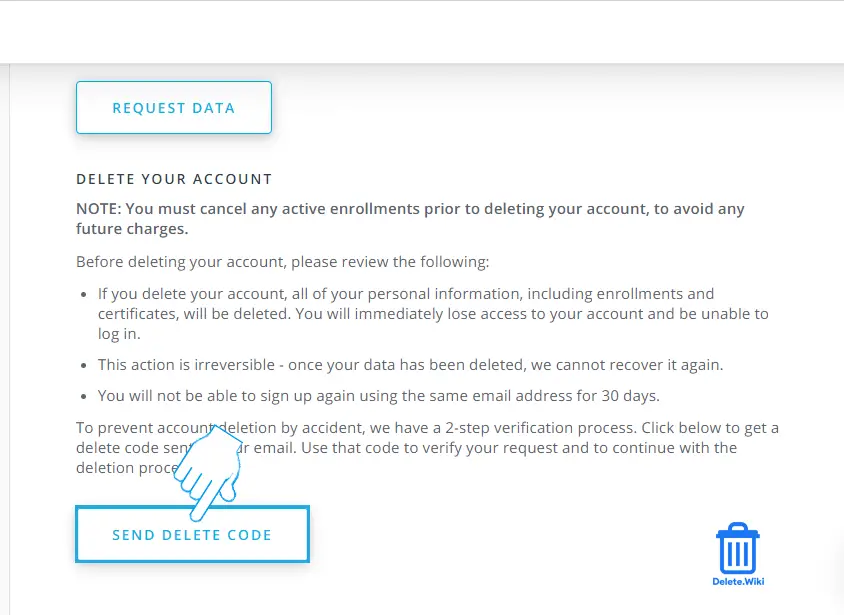
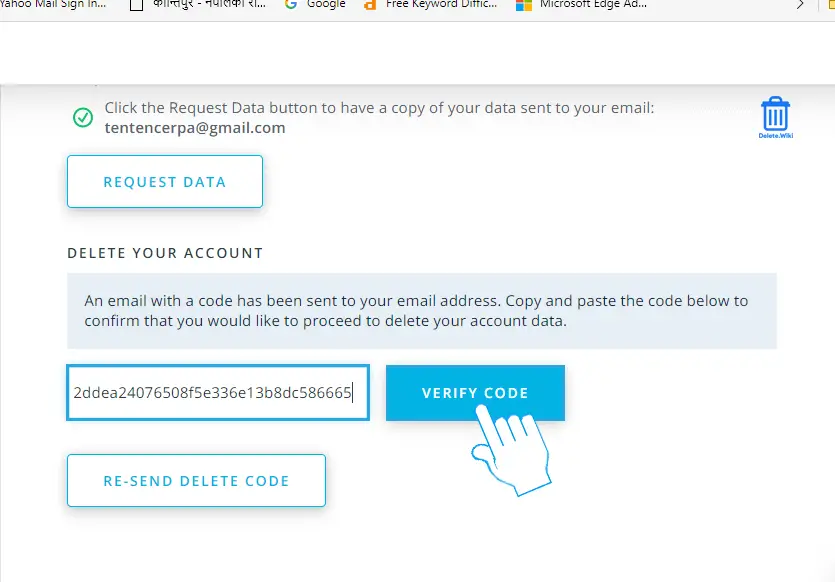
- Scroll down to the bottom of the page and click on SEND DELETE CODE. Now, Udacity will email you a verification code for your account closure.
- Enter the verification code and click on VERIFY CODE.
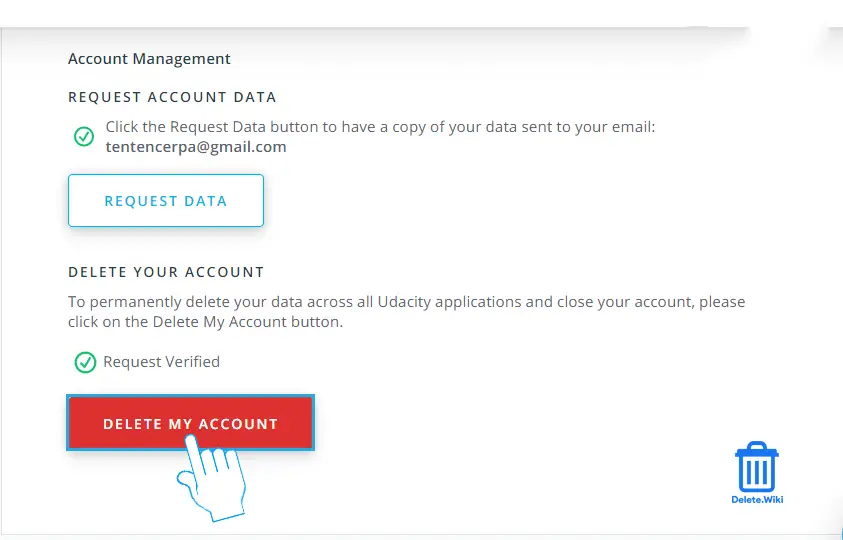
- Click on DELETE MY ACCOUNT.
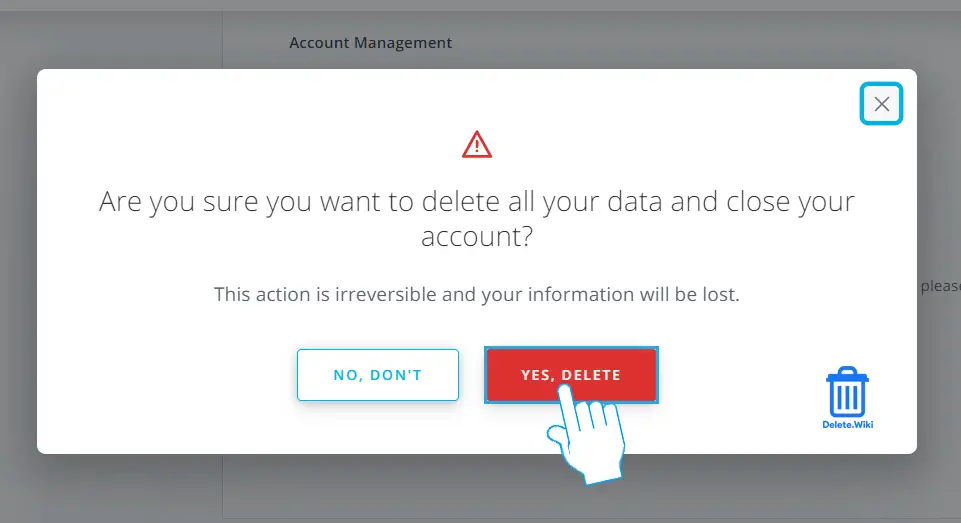
- A confirmation popup will appear, choose YES, DELETE to finish.
What happens when you delete your Udacity account?
- Your account will be inaccessible.
- All your information, including enrollments and certificates, will be deleted.
- You cannot create a new account with the same email address for 30 days of your account closure.
Don’t know how to delete your Whatsapp message? Check out our article, here.
How to cancel your Udacity subscription?
Deletion of the Udacity account is permanent, and it cannot be recovered later. When you delete your account, you won’t have access to your account anymore. You cannot sign up to Udacity using the same email address for a month, and all your information will be erased. If you have any subscriptions enrolled, you have to cancel those subscriptions first as they will not be canceled automatically.
- Visit classroom.udacity.com and sign in to your account if you haven’t.
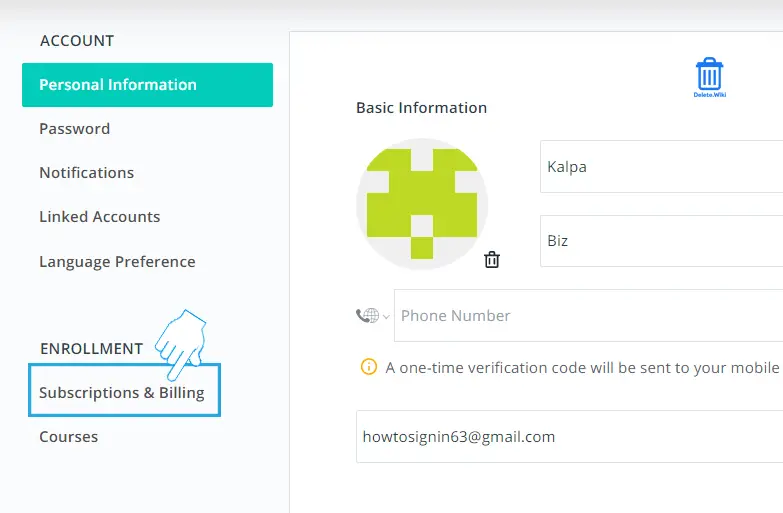
- Click on Settings at the bottom left corner.
- Under ENROLLMENT, select Subscription & Billing.
- Now, follow the on-screen instructions to confirm.
You can also avoid paying for the next period’s fees by canceling your automatic subscription a few days before your next billing date.